Monday, March 31, 2014

This tutorial is written for those with knowledge of PSP
Supplies Needed:
Tube of choice: I'm using the wonderful art work of Keith Garvey
This tube was purchased at PTE which has closed
You must obtain a license to use this art at his store HERE
FTU Collab Scrap Kit from Design by Sarah and TammyKat
You can download this awesome kit HERE
Apply any mask of choice
Xero Radiance
Eyecandy gradient Glow
Open blank canvas 700x700
Open circle frame by TK and place in center
Grab the freehand tool and go around frame
Open paper 6 by TK and paste as new layer
Selections invert delete
Move paper under frame
Open tube and place behind frame in center
Apply Xero Radiance with settings of choice
Drop shadow tube
Duplicate tube and move to top - hide for now
Grab the freehand tool again and go around frame
Selections invert and make sure the tube layer is highlighted
Selections delete
Unhide top tube and using eraser remove all parts showing under frame
Open frame 4 by SB and place behind the circle frame
Using the magic wand click inside each frame
Selections modify expand by 8
Create new layer
Open papergreytext by TK and paste into selection
Open ticketwhole by TK and place to top of left above the square frames
Rotate ticket a little to the left
Open flower by TK and place it to top right of tag behind square frames
Open black glitter and place behind flower
Open xxx beads by TK and place to bottom left of tag
Open wordart 1 by SB and place beside the xxx to the right
Resize wordart 65 & apply eyecandy gradient glow
Place your name where you like it
Add the Copyright and your License Number for the tube
Resize to your liking and save as PNG
This tutorial was created on March 14,2014 by Rhonda
Any resemblance to another Tag or Tutorial is purely coincidental

Labels:FTU,Pimp My Tags With Scraps | 0
comments

This tutorial is written for those with knowledge of PSP
Supplies Needed:
Tube of choice: I'm using the wonderful art work of Very Many
You can purchase this tubes at their store HERE
FTU Scrap Kit by Mizteeque called "Chicks New Year"
You can download this awesome kit on our blog HERE
FTU Cluster by Tee on our blog HERE
Mask of choice
Open cluster frame - Shift D to duplicate and close original
Resize frame and make canvas size 700x665
Click inside frame with magic wand
Selections modify 15
Open paper 2 and paste as new layer
Selections invert
Move paper under frame
I used the following elements:
Element 2
Element 4
Element 6
Element 8
Element 15
Element 23
Element 25
Element 33
Element 34
Open paper 12 and apply mask
Add the Copyright and your License Number for the tube
Resize to your liking and save as PNG
This tutorial was created on March 9,2014 by Rhonda
Any resemblance to another Tag or Tutorial is purely coincidental

Labels:Cluster Frame Tuts,FTU,Mizteeque | 0
comments
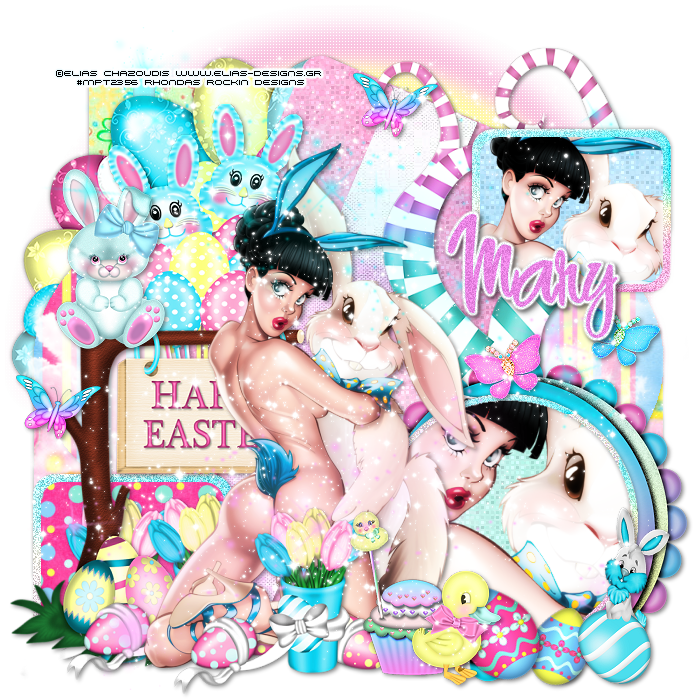
This tutorial is written for those with knowledge of PSP
Supplies Needed:
Tube of choice: Im using the wonderful art work of Elias Chatzoudis
This tube was purchased at MPT which has closed
You must obtain a license to use this art at Elias's store HERE
FTU Scrap Kit by Mary from Sweet as Honey Creationz called "Rainbowlicious Easter" HERE
Easter Template by Samantha from Aussie Angel Creations HERE
Don't forget to leave a thank you when downloading
Plugins Used:
Xero Radiance
Weave Effect from PSP
Open template - Shift D to duplicate then close out original
Delete copyright & rabbit layers
paste a paper of choice from the kit - I used paper5
selection invert delete
select none delete the original
paste a paper of choice from the kit - I used paper1
selection invert delete
select none delete the original
paste a paper of choice from the kit - I used paper3
selection invert delete
select none delete the original
paste a paper of choice from the kit - I used paper7
selection invert delete
select none delete the original
paste a paper of choice from the kit - I used paper6
selection invert delete
select none delete the original
paste a paper of choice from the kit - I used paper8
selection invert delete
select none delete the original
apply Xero Radiance with default settings
open frame 4 and paste into selections
select none & add noise of choice
paste a paper of choice from the kit - I used paper9
selection invert delete
select none delete the original
apply Xero Radiance with default settings
paste a paper of choice from the kit - I used paper2
selection invert delete
select none delete the original
Add Xero Radiance with settings of choice
I used the following:
Bunny 1&3
Bunny Wreath
Butterfly 1,2&3
Clouds
Cupcake
Ducky
Easter Balloons
Easter Egg 1&2
Easter Sign
Eggs & Tulips
Frame 5
Rainbow
Sparkles 1,2&3
Swirls
Wreath
Add the Copyright and your License Number for the tube
Resize to your liking and save as PNG
This tutorial was created on March 23,2013 by Rhonda
Any resemblance to another Tag or Tutorial is purely coincidental

Labels:Easter,FTU | 1 comments
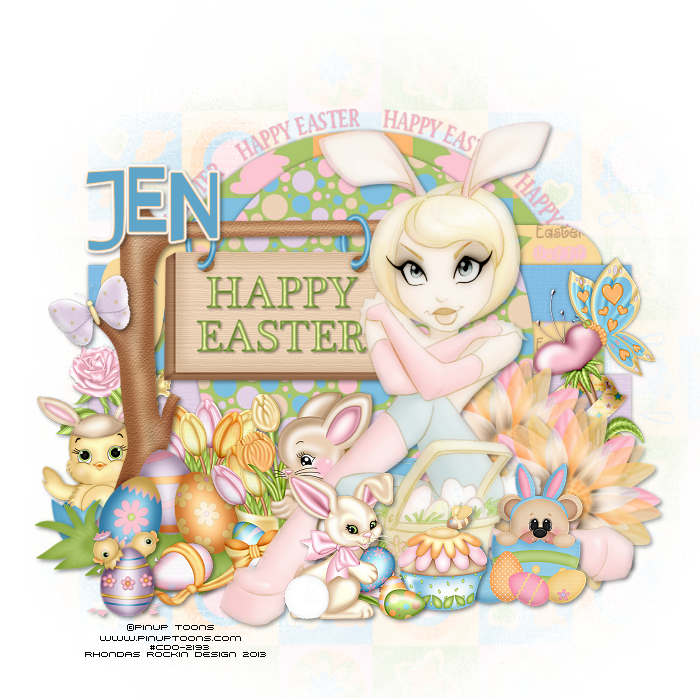
This tutorial is written for those with knowledge of PSP
Supplies Needed:
Tube of choice: Im using the wonderful art work of Pinup Toons
You can find his art at CDO HERE
PTU Scrap Kit by Jen from Sweet Temptations called "A Sweet Easter"
You an purchase this awesome kit HERE
Easter Template #1 by Flaminsal HERE
Mask of choice
Don't forget to leave a thank you when downloading
Xero Porcelin
Open template - Shift D to duplicate then close out original
delete copyright
paste a paper of choice from the kit - I used paper1
selection invert delete
select none delete the original
add new layer & flood fill with light pink
select none delete the original
paste a paper of choice from the kit - I used paper4
selection invert delete
select none delete the original
add 2 colors of choice on new layer
select none delete the original
add texture of choice
paste a paper of choice from the kit - I used paper14
selection invert delete
select none delete the original
paste a paper of choice from the kit - I used paper9
selection invert delete
select none delete the original
apply Xero Porcelin with settings of choice
I used the following:
Bear 3
BFly 1
Bunny 2&3
Chick
Cupcake 3
Egg Chicks
Egg
Flowers 1,5&6
Sign
Tulips
Open paper 1 & apply mask of choice
Add the Copyright and your License Number for the tube
Resize to your liking and save as PNG
This tutorial was created on March 24, 2013 by Rhonda
Any resemblance to another Tag or Tutorial is purely coincidental

Labels:Easter,Jens Sweet Temptations,PTU | 0
comments

This tutorial is written for those with knowledge of PSP
Supplies Needed:
Tube of choice: Im using the wonderful art work of Elias Chatzoudis
This tube was purchased at MPT which has closed
You can purchase his tubes at his store HERE
FTU Scrap Kit by Xtenziv called "Easter Naturally" HERE
Template #13 from Marilyn's Creationz HERE
Wordart from The Okie Toothfairy HERE
Don't forget to leave a thank you when downloading
Plugins Used:
Xero Radiance
Eyecandy for wordart
Open template - Shift D to duplicate then close out original
Resize all layers 80%
Canvas size 700x700
Delete copyright
paste a paper of choice from the kit - I used paper1
selection invert delete
select none delete the original
paste a paper of choice from the kit - I used paper2
selection invert delete
select none delete the original
paste a paper of choice from the kit - I used paper7
selection invert delete
select none delete the original
paste a paper of choice from the kit - I used paper3
selection invert delete
select none delete the original
paste a paper of choice from the kit - I used paper4
selection invert delete
select none delete the original
Add Eyecandy Gradient Glow
apply Xero radiance with settings of choice
I used the following:
Balloon 2
Bow 3
Easterbug
Butterfly 1&2
Easter Button 2&3
Cupcake
Eggs 1,2&3
Flower 2,3,4,6&8
Tag 1
Add the Copyright and your License Number for the tube
Resize to your liking and save as PNG
This tutorial was created on March 27,2013 by Rhonda
Any resemblance to another Tag or Tutorial is purely coincidental

Labels:Easter,FTU | 3
comments

This tutorial is written for those with knowledge of PSP
Supplies Needed:
FTU Scrap Kit by Jen from Sweet Temptations called "Jellybean Junction"
You an download this adorable kit HERE
Template #185 by Beckys Creations HERE
Mask by Jus Graphix - first mask in group HERE
Don't forget to leave a thank you when downloading
Open template - Shift D to duplicate then close out original
Canvas size 700x640
delete copyright, all stars & shadow layers
paste a paper of choice from the kit - I used paper7
selection invert delete
select none delete the original
paste a paper of choice from the kit - I used paper6
selection invert delete
select none delete the original
paste a paper of choice from the kit - I used paper1
selection invert delete
select none delete the original
paste a paper of choice from the kit - I used paper8
selection invert delete
select none delete the original
paste a paper of choice from the kit - I used paper5
selection invert delete
select none delete the original
paste a paper of choice from the kit - I used paper3
selection invert delete
select none delete the original
paste a paper of choice from the kit - I used paper4
selection invert delete
select none delete the original
I used the following:
Boat Chick
Boat Ride
Bunny 1
Cart Chick
Chick
Fence
Grass
House
Pot
Train 1
Tree 1
Trike Duck
Welcome Sign
Open paper 4 and apply mask
Add the Copyright and your License Number for the tube
Resize to your liking and save as PNG
This tutorial was created on March 28,2013 by Rhonda
Any resemblance to another Tag or Tutorial is purely coincidental

Labels:Easter,FTU,Jens Sweet Temptations | 0
comments
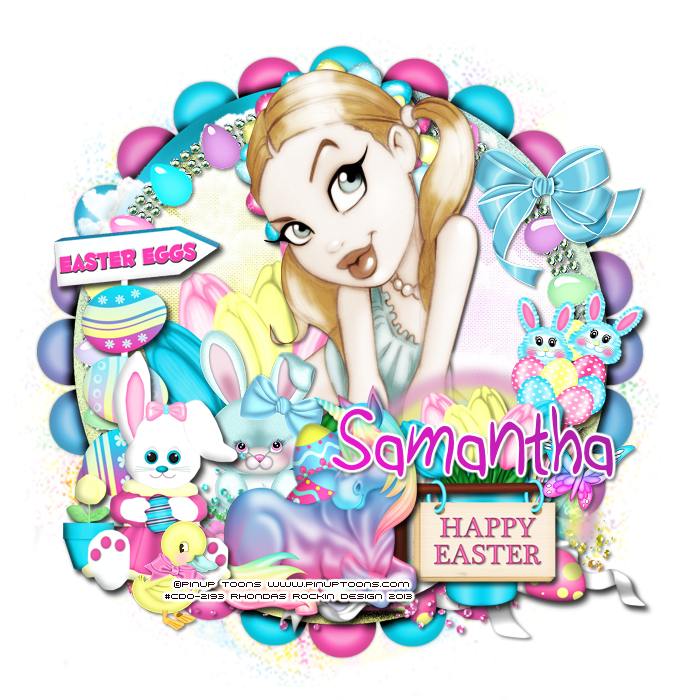
This tutorial is written for those with knowledge of PSP
Supplies Needed:
Tube of choice: Im using the wonderful art work of Pinup Toons
Which you must obtain a license to use at CDO HERE
FTU Cluster Frame by Aussie Angel HERE
FTU kit by Mary called Rainbowlicious Easter HERE
Mask of choice
Please leave some love when you download this mask..A little thanks goes a long way
Xero Radiance
Open cluster frame - shift D and close original
canvas size 700x700
Grab the freehand tool and draw around the frame
Open paper 6, selections invert delete
Move paper under frame
apply Xero Radiance
I used the following:
Bow 2
Bunny 1
Butterfly 3
Clouds
Ducky
Easter Egg 1&2
Eggs & Tulips
Frame 5
Open paper 1 & apply mask
Add the Copyright and your License Number for the tube
Resize to your liking and save as PNG
This tutorial was created on April 1,2013 by Rhonda
Any resemblance to another Tag or Tutorial is purely coincidental

Labels:Easter,FTU | 0
comments
Saturday, March 8, 2014

This tutorial is written for those with knowledge of PSP
Supplies Needed:
Tube of choice: Im using the wonderful art work of Tony Tzanoukakis
You must obtain a license to use his work HERE
PTU Scrap Kit by Designs by Sarah called "You're in Luck"
You an purchase this awesome kit at Pimp My Tags With Scraps HERE
Wordart by Tarnishes Halo Designs HERE
Mask of choice
Open blank 700x700 canvas
Open frame 2 - rotate 90 to right and center
Click inside frame with magic wand
Selections, modify expand by 8
Open paper 3 & paste as new layer
Selections delete
Move paper under frame
Apply Xero Radiance with settings of choice
Here are the ones I used:
Bow 3
Butterfly
Cupcake
Flower 1&2
Greenery
Leaves
Print 1
Tree
Open paper 6 & apply mask
Add the Copyright and your License Number for the tube
Resize to your liking and save as PNG
This tutorial was created on March 7,2014 by Rhonda
Any resemblance to another Tag or Tutorial is purely coincidental


This tutorial is written for those with knowledge of PSP
Supplies Needed:
Tube of choice: I'm using the wonderful art work of Lady Mishka
This tube was bought at PTE which has closed
You can purchase her tubes now at PFD HERE
FTU Scrap Kit by Punky Butts HERE
Template #14 by Designs by Wendy HERE
Mask #9 by Punky Butts HERE
Mask is 3rd one down on page
Don't forget to leave a thank you when downloading
Xero Radiance
Open template - Shift D to duplicate then close out original
delete copyright & everything except circle background & circle frame
paste a paper of choice from the kit - I used paper4
selection invert delete
select none delete the original
Erase all that is outside circle
paste a paper of choice from the kit - I used paper6
selection invert delete
select none delete the original
Open sign 2 - resize 59%, rotate to the left a little & place to top left
Come down with sign a little so it isn't right at the top
Open bow 3 - resize 48% and place at end of sign to the right
Open barrel and place to right of frame about halfway
Open mushroom - image mirror and place in fron to barrel
Open rose - resize 40% and place around the mushrooms
Duplicate rose as many times as you wish
Open clover coins - resize 52% and place in front of mushrooms
Duplicate these as many times as you wish
Open pot of gold - resize 62% and place to far left of frame
Place tube beside the pot of gold
Open flair - resize 43% and place to right of pot of gold
Open Leprechaun - resize 42% and place beside the coins
Open drink 1 -resize 35% and place in front of flair
Merge your layers
Open paper 14 & apply mask
Resize mask 90% and center around tag
Add the Copyright and your License Number for the tube
Resize to your liking and save as PNG
This tutorial was created on February 22,2014 by Rhonda
Any resemblance to another Tag or Tutorial is purely coincidental

Labels:FTU,St Patricks Day | 0
comments
Tuesday, March 4, 2014

Supplies Needed:
Tube of choice: I'm using the wonderful art work of Elias Chatzoudis
This tube was purchased at PTE which has closed
You can purchase his work at this store HERE
PTU Scrap Kit by Aurelie from Purple Dreams called "Lucky Charm"
You an purchase this awesome kit HERE
Template #521 by Millie HERE
Stone Mask by Ginas Gems HERE
Don't forget to leave a thank you when downloading
Xero Radiance
Open template - Shift D to duplicate then close out original
Resize template 92% all layers
Canvas size 700x675
delete copyright,layers 11&12
paste a paper of choice from the kit - I used paper12
selection invert delete
select none delete the original
paste a paper of choice from the kit - I used paper11
selection invert delete
select none delete the original
paste a paper of choice from the kit - I used paper10
selection invert delete
select none delete the original
paste a paper of choice from the kit - I used paper9
selection invert delete
select none delete the original
paste a paper of choice from the kit - I used paper6
selection invert delete
select none delete the original
paste a paper of choice from the kit - I used paper1
selection invert delete
select none delete the original
paste a paper of choice from the kit - I used paper5
selection invert delete
select none delete the original
paste a paper of choice from the kit - I used paper2
selection invert delete
select none delete the original
paste a paper of choice from the kit - I used paper3
selection invert delete
select none delete the original
paste a paper of choice from the kit - I used paper15
selection invert delete
select none delete the original
I added noise and gradient glow to mine
Xero Radiance with settings of choice
I used the following:
Barrel
Bow
Glitter
Gold
Harp
Horseshoe
Leprechaun
Rainbow
Shamrocks
Sparkles 1&2
Tag
Open paper 2 and apply mask
Add the Copyright and your License Number for the tube
Resize to your liking and save as PNG
This tutorial was created on March 4,2014 by Rhonda
Any resemblance to another Tag or Tutorial is purely coincidental

Labels:PTU,Purple Dreams,St Patricks Day | 0
comments
Monday, March 3, 2014
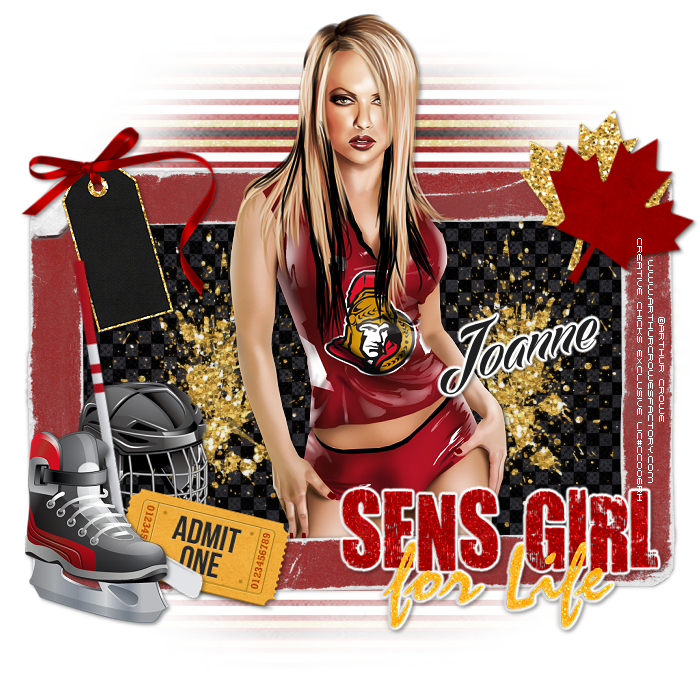
This tutorial is an exclusive at Creative Chick Forum

Labels:CC Excluisve | 0
comments
Subscribe to:
Posts
(Atom)
Grab My Blinkie

About Me
Hello friends and welcome to my blog!!! My name is Rhonda and I live in South East Ga., little town called Lumber City. I have 2 sons, 2 DIL's and 3 grandchildren. I work in healthcare as an RN.
When not working, I enjoy playing in PSP. It has been my passion over 20 years. PSP is relaxing and takes my mind away from troubles of life. I enjoy writing tutorials on my downtime.
I am expanding my creations to frames, clusters, templates and hopefully masks. I have NEVER made a mask but I have the time to learn now and I am excited. These will be FTU, all I ask is please download from the blog and if you are in a group or forum please send others to my blog and DO NOT HOTLINK. I would love to see your creations and show them off.
If you need to contact me with any questions concerning my tutorials or creations, send me an email. I am aware some of my older tutorials have links that are no longer working due to designers closing their blog. This is beyond my control. I am unable to share anything which was not shareable before. I honor all designers TOU.
I CT For
T.O.U.
All tutorials that are on my blog have been written by me. Any resemblance to another tag or tutorial is purely coincidental. Please do not copy and claim as your own. You are welcome to use these tutorials in any groups or forums but please link back to my blog. I would love to see any tag that is made using my tutorial. If you have any questions or concerns you can contact me at rsheath31549@yahoo.com.
Cluster Frames are Personal Use ONLY!!!! Please do not claim them as your own or rip them apart. You are welcome to use in forums or groups but please link back to blog. My TOU are included in the downloads. I would love to see any creations you make with my tuts or other creations. Send them to me and I will display them.
My goal for this blog is to make creations others can use and enjoy. I want to focus on being positive through difficult times. Show importance of accepting others, no judging, just respect. Showing kindness to others can change another's life, even for a brief time
Powered by Blogger.
Search
Categories
- Adrienne Designs
- Alicia Mujica
- April Shareables
- Art-Content
- Awards
- Awareness
- Barbara Jensen
- Beth Show-Off
- Birthday
- Black Widow Creations
- Blog Train
- BLT Dezingz
- Breast Cancer Awareness
- CC Excluisve
- CDO
- Chachaz Creations
- Chichi Designz
- Chick News
- Chris Pastel
- Christmas
- Cluster Frame Tuts
- Cluster.
- Cluster. FTU Cluster Frames
- Coffee Arts Design's
- Country
- Daelmans Designs
- Dangerously Delicious Designz
- Deedles and Doodles
- DeesSign Depot
- Designer Scraps
- Designz By Anorie
- Designz by Shelly
- Diamond Creations
- Digital Art Heaven
- Doodle By Design
- Dreaming With Bella
- Easter
- Elegance Fly
- Elli's
- Facebook Freebie
- Fall
- FTU
- FTU Cluster Frames
- FTU Tube
- General
- GraphFreaks
- Halloween
- Hania Design
- Here2Help Mirella
- Icy Blue Mystic Designs
- Inzpired Creationz
- Inzpired Creationz Store
- Jens Sweet Temptations
- July 4th
- Kathy's PSP Designs
- Kizzed by Kelz
- Limited FTU
- MardiGras
- Military
- Misticheskaya
- Mizteeque
- Mother's Day
- My Tagging Addiction
- New Years
- News
- News about kits
- No Scraps
- Pammers Passion
- Patriotic
- PFD
- Pimp My Tags With Scraps
- Pink Paradox
- PTU
- PTU Clusters
- PTU now FTU
- Purple Dreams
- Retired Kits
- s
- S&Co
- School
- Scrap it Studio
- Show Off
- Snags
- Spring
- St Patricks Day
- Steampunk
- Summer
- Tagcatz Design
- Tags with no Tuts
- Thanksgiving
- The Taggers Lounge
- The Taggers Lounge Exclusive
- Tiny Turtles
- Tiny Turtles Store
- Updates
- Valentine
- VeryMany
- VM Artists
- VMArtists
- Western
- Wicked Princess Scraps
- Winter
- Wonderland
- WordArt
- Zindy Zone
- Zlatam Store


