Wednesday, February 19, 2014

Kiss from the Creative Chicks sent me her result from my Beautiful tut

Labels:Show Off | 0
comments
Sunday, February 16, 2014

This tutorial is written for those with knowledge of PSP
Supplies Needed:
Tube of choice: Im using the wonderful art work of Wendy Gerber
This tube was purchased at SATC which has closed
You can purchase these tubes at now at AIL HERE
FTU Scrap Kit by Mizteeque from called "A Hint of Goth"
You can download this awesome kit HERE
Mask of choice
Xero Radiance
Open blank 700x700 canvas
Open element 66 & paste as new layer
Using the magic wand click inside frame
Selections modify expand by 8
Open paper 1 & paste as new layer
Selections invert delete
Move paper under frame
Open close-up of tube and paste to left side of frame
Apply Xero Radiance with settings of choice
Apply Xero Radiance again
I always build around my tube
Element 7
Element 8
Element 20
Element 29
Element 31
Element 35
Element 43
Element 56
Element 57
Element 58
Element 61
Open paper 9 & apply mask of choice
Add the Copyright and your License Number for the tube
Resize to your liking and save as PNG
This tutorial was created on Februray 16,2014 by Rhonda
Any resemblance to another Tag or Tutorial is purely coincidental

Labels:FTU,Mizteeque | 0
comments
Friday, February 14, 2014

This tutorial is written for those with knowledge of PSP
Supplies Needed:
Tube of choice: Im using the wonderful art work of Alex Prihodko
Which you must obtain a license to use at PFD HERE
FTU Scrap Kit by Vesta found at the CC blog HERE
Template #2 by Melissa found at our blog HERE
Mask #444 by Vix HERE
Don't forget to leave a thank you when downloading
Open template - Shift D to duplicate then close out original
Resize all layers 85% the increase canvas size to 700x700
delete copyright
add new layer and flood fill with solid color of choice
select none delete the original
add noise
paste a paper of choice from the kit - I used paper9
selection invert delete
select none delete the original
paste a paper of choice from the kit - I used paper8
selection invert delete
select none delete the original
paste a paper of choice from the kit - I used paper4
selection invert delete
select none delete the original
add new layer and flood fill with solid color of choice
select none delete the original
I used the following:
Element 1
Element 8
Element 10
Element 20
Element 24
Element 31
Wordart
Open paper 7 and apply mask of choice
Add the Copyright and your License Number for the tube
Resize to your liking and save as PNG
This tutorial was created on February 14,2014 by Rhonda
Any resemblance to another Tag or Tutorial is purely coincidental

Labels:Show Off | 0
comments

This tutorial is written for those with knowledge of PSP
Supplies Needed:
Tube of choice: Im using the wonderful art work of Alex Prihodko
Which you must obtain a license to use at PFD HERE
PTU Scrap Kit by Jen from Sweet Temptations called "You Warm My Heart"
You an purchase this awesome kit HERE
Valentine Template #1 by Brutal Designs HERE
Mask of choice
Don't forget to leave a thank you when downloading
Open template - Shift D to duplicate then close out original
delete copyright,wordart,hearts & stars
paste a paper of choice from the kit - I used paper1
selection invert delete
select none delete the original
add new layer and flood fill with brown
select none delete the original
add noise with settings of choice
paste a paper of choice from the kit - I used paper7
selection invert delete
select none delete the original
paste a paper of choice from the kit - I used paper5
selection invert delete
select none delete the original
paste a paper of choice from the kit - I used paper3
selection invert delete
select none delete the original
paste a paper of choice from the kit - I used paper8
selection invert delete
select none delete the original
paste a paper of choice from the kit - I used paper10
selection invert delete
select none delete the original
I used the following:
2Hearts
Balloon Hearts
Candybox
Cocoa 1
Cookie 1&2
Forever Yours
Gift
Hot Chocolate
I Love You Heart
Ribbon 2
Stamp
Strawberry Shake
Tea
Whip Topping
Open paper 9 and apply mask of choice
Add the Copyright and your License Number for the tube
Resize to your liking and save as PNG
This tutorial was created on February 12,2014 by Rhonda
Any resemblance to another Tag or Tutorial is purely coincidental

Labels:Jens Sweet Temptations,PTU,Valentine | 0
comments
Sunday, February 9, 2014

This tutorial is written for those with knowledge of PSP
Supplies Needed:
Tube of choice: I'm using the wonderful art work of Arthur Crowe
You must obtain a license to use this art at his store HERE
PTU Scrap Kit from Pimp'd Designz called "Angel Eyes"
You an purchase this awesome kit at Pimp My Tags With Scraps HERE
Xero Porcelin
Xero Radiance
PhotoEffex Scanlines
Open blank canvas 700x700
Open frame 3 resize and place in center
Grab the deforem tool and move to the left a little
Duplicate image mirror
Click inside each frame with magic wand
Selections modify expand by 4
Open paper 6 & paste as new layer
Selections invert delete
Move paper under frame
Place closeup of tube in each frame
Apply Xero Radiance with settings of choice
Apply PhotoEffex with settings of choice
Apply Xero Radiance again
Apply Xero Porcelin with settings of choice
I used:
Cloud
Feathers
Lace Heart
Leaves 1
Ribbon 1
Sparkle 2&3
Star 1
Add the Copyright and your License Number for the tube
Resize to your liking and save as PNG
This tutorial was created on Feburary 7,2014 by Rhonda
Any resemblance to another Tag or Tutorial is purely coincidental

Labels:Pimp My Tags With Scraps,PTU | 0
comments

This tutorial is written for those with knowledge of PSP
Supplies Needed:
No tube needed for this tutorial
PTU Scrap Kit by Jen from Sweet Temptations called "Your Love Bowls me Away"
You an purchase this awesome kit HERE
Love Heart Template by Flaminsal HERE
Mask #30 by Chrissy Chaos HERE
Don't forget to leave a thank you when downloading
Open template - Shift D to duplicate then close out original
Canvas size 700x700
delete copyright, dotted circle & wordart
paste a paper of choice from the kit - I used paper5
selection invert delete
select none delete the original
paste a paper of choice from the kit - I used paper3
selection invert delete
select none delete the original
paste a paper of choice from the kit - I used paper2
selection invert delete
select none delete the original
paste a paper of choice from the kit - I used paper8
selection invert delete
select none delete the original
paste a paper of choice from the kit - I used paper10
selection invert delete
select none delete the original
paste a paper of choice from the kit - I used paper9
selection invert delete
select none delete the original
I used the following:
bear 3
Bouquet
Calender
Candybar
Candy Box
Candy Box 1
Flowers
Hearts
Hot Air Balloon
Kiss
Lollipop
Mailbox
Rose Box
Stamp
WordArt
Open paper 3 & apply mask
Add the Copyright and your License Number for the tube
Resize to your liking and save as PNG
This tutorial was created on February 7,2014 by Rhonda
Any resemblance to another Tag or Tutorial is purely coincidental

Labels:Jens Sweet Temptations,PTU,Valentine | 0
comments
Monday, February 3, 2014

This tutorial is written for those with knowledge of PSP
Supplies Needed:
Tube of choice: Im using the wonderful art work of Pinup Toons
You must obtain a license to use this art at CDO HERE
PTU Scrap Kit from Pimp'd Designz called "Bubble Pop"
You an purchase this awesome kit at Pimp My Tags With Scraps HERE
Mask of choice
Open blank canvas 700x626
Open frame 3 and place in center
Click inside frame with magic wand
Selections modify expand by 4
Open paper 8 & paste as new layer
Selections invert delete
Move paper under frame
I used:
Cupcake
Polish
Print 1
Ribbon 2
Sneaker
Open paper 3 & apply mask of choice
Add the Copyright and your License Number for the tube
Resize to your liking and save as PNG
This tutorial was created on February 3,2014 by Rhonda
Any resemblance to another Tag or Tutorial is purely coincidental

Labels:Pimp My Tags With Scraps,PTU | 0
comments

This tutorial is written for those with knowledge of PSP
Supplies Needed:
Tube of choice: Im using the wonderful art work of Arthur Crowe
Which you must obtain a license to use at his store HERE
PTU Scrap Kit by Lizquis Scraps called Wonderful Babe HERE
Mask of choice
Open a white blank canvas 700x700
Open frame 4 from kit and place as a new layer
Click inside frame with magic wand
Selections modify expand by 6
Open paper 12 and paste as new layer
Move paper under frame
Place tube to right of frame
I used the following:
Basket
Branch 2&3
Cake
Castle
Grass 1&2
Hat
Ladder 1
Mushroom Bunny
Mushroom 1,2&3
Potion
Text
Worm Mushroom
Open paper 2 & apply mask
Add the Copyright and your License Number for the tube
Resize to your liking and save as PNG
This tutorial was created on February 3,2014 by Rhonda
Any resemblance to another Tag or Tutorial is purely coincidental

Labels:PTU | 0
comments

This tutorial is written for those with knowledge of PSP
Supplies Needed:
Tube of choice: I'm using the wonderful art work of Keith Garvey
You can purchase these tubes at his store HERE
FTU Scrapkit by Purple Dreams HERE
Open blank canvas size 700x700
Open frame 2 and paste as new layer
Grab the magic wand & click inside frame
Selections modify expand by 6
Open paper 4 & paste as new layer
Selections invert delete
Move paper under frame
Open bow 2 - image flip - place to top right
Open bear - resize 65% & place right below the bow
Open cupckae - resize 38% & place to left of bear
Open gift 2 - resize 47& & place below the bear
Open gift - resize 30% & place beside other gift
Open word - resize 58% & place to left of small gift
Open chocolate heart - resize 58% & place to bottom far left of frame
Open kitty - resize 30% & place in front of word
Open glass - resize 35% & place beside the gig gift box
Add as many sparkles as you want on tag
Open your tube and place to left of tag
Open paper 9 & add mask of choice
Add the Copyright and your License Number for the tube
Resize to your liking and save as PNG
This tutorial was created on January 25,2014 by Rhonda
Any resemblance to another Tag or Tutorial is purely coincidental

Labels:FTU,Valentine | 1 comments
Sunday, February 2, 2014

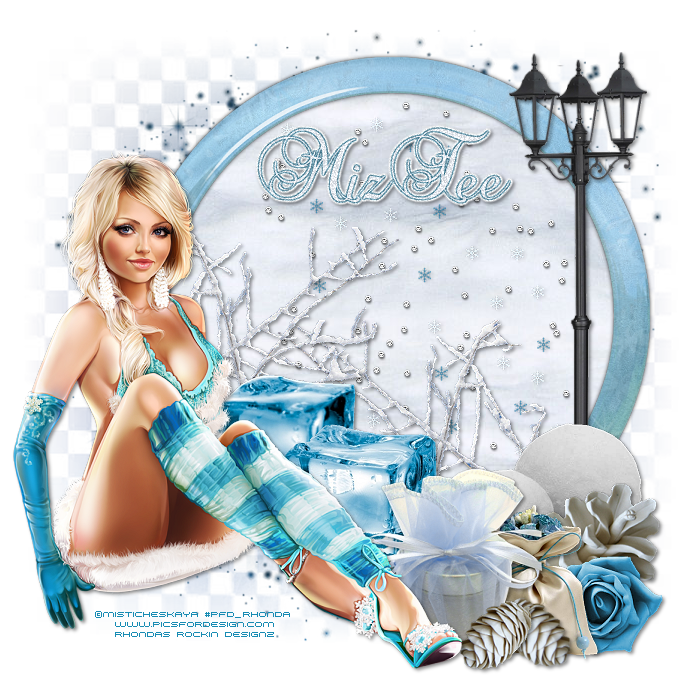
This tutorial is written for those with knowledge of PSP
Supplies Needed:
Tube of choice: I'm using the wonderful art work of Misticheskaya
You can purchase his tubes at Pics for Design HERE
PTU Scrap Kit by Mizteeque from called "Blue Ice"
You an purchase this awesome kit HERE
Masks of choice
Xero Radiance
Open blank canvas 700x700
Open element 20 - resize and pasye as new layer
Click inside frame with magic wand
Selections modify expand by 6
Open paper 8 and paste as new layer
Selections invert delete
Move paper under frame
I used the following:
Element 23
Element 28
Element 39
Element 40
Element 62
Element 63
Element 64
Element 70
Element 72
Element 73
Open paper of choice & apply mask
Add the Copyright and your License Number for the tube
Resize to your liking and save as PNG
This tutorial was created on February 2,2014 by Rhonda
Any resemblance to another Tag or Tutorial is purely coincidenta

Labels:Mizteeque,PTU,Winter | 0
comments
Subscribe to:
Posts
(Atom)
Grab My Blinkie

About Me
Hello friends and welcome to my blog!!! My name is Rhonda and I live in South East Ga., little town called Lumber City. I have 2 sons, 2 DIL's and 3 grandchildren. I work in healthcare as an RN.
When not working, I enjoy playing in PSP. It has been my passion over 20 years. PSP is relaxing and takes my mind away from troubles of life. I enjoy writing tutorials on my downtime.
I am expanding my creations to frames, clusters, templates and hopefully masks. I have NEVER made a mask but I have the time to learn now and I am excited. These will be FTU, all I ask is please download from the blog and if you are in a group or forum please send others to my blog and DO NOT HOTLINK. I would love to see your creations and show them off.
If you need to contact me with any questions concerning my tutorials or creations, send me an email. I am aware some of my older tutorials have links that are no longer working due to designers closing their blog. This is beyond my control. I am unable to share anything which was not shareable before. I honor all designers TOU.
I CT For
T.O.U.
All tutorials that are on my blog have been written by me. Any resemblance to another tag or tutorial is purely coincidental. Please do not copy and claim as your own. You are welcome to use these tutorials in any groups or forums but please link back to my blog. I would love to see any tag that is made using my tutorial. If you have any questions or concerns you can contact me at rsheath31549@yahoo.com.
Cluster Frames are Personal Use ONLY!!!! Please do not claim them as your own or rip them apart. You are welcome to use in forums or groups but please link back to blog. My TOU are included in the downloads. I would love to see any creations you make with my tuts or other creations. Send them to me and I will display them.
My goal for this blog is to make creations others can use and enjoy. I want to focus on being positive through difficult times. Show importance of accepting others, no judging, just respect. Showing kindness to others can change another's life, even for a brief time
Powered by Blogger.
Search
Categories
- Adrienne Designs
- Alicia Mujica
- April Shareables
- Art-Content
- Awards
- Awareness
- Barbara Jensen
- Beth Show-Off
- Birthday
- Black Widow Creations
- Blog Train
- BLT Dezingz
- Breast Cancer Awareness
- CC Excluisve
- CDO
- Chachaz Creations
- Chichi Designz
- Chick News
- Chris Pastel
- Christmas
- Cluster Frame Tuts
- Cluster.
- Cluster. FTU Cluster Frames
- Coffee Arts Design's
- Country
- Daelmans Designs
- Dangerously Delicious Designz
- Deedles and Doodles
- DeesSign Depot
- Designer Scraps
- Designz By Anorie
- Designz by Shelly
- Diamond Creations
- Digital Art Heaven
- Doodle By Design
- Dreaming With Bella
- Easter
- Elegance Fly
- Elli's
- Facebook Freebie
- Fall
- FTU
- FTU Cluster Frames
- FTU Tube
- General
- GraphFreaks
- Halloween
- Hania Design
- Here2Help Mirella
- Icy Blue Mystic Designs
- Inzpired Creationz
- Inzpired Creationz Store
- Jens Sweet Temptations
- July 4th
- Kathy's PSP Designs
- Kizzed by Kelz
- Limited FTU
- MardiGras
- Military
- Misticheskaya
- Mizteeque
- Mother's Day
- motivational
- My Tagging Addiction
- New Years
- News
- News about kits
- No Scraps
- Pammers Passion
- Patriotic
- Personal
- PFD
- Pimp My Tags With Scraps
- Pink Paradox
- PTU
- PTU Clusters
- PTU now FTU
- Purple Dreams
- Retired Kits
- s
- S&Co
- School
- Scrap it Studio
- Show Off
- Snags
- Spring
- St Patricks Day
- Steampunk
- Summer
- Tagcatz Design
- Tags with no Tuts
- Thanksgiving
- The Taggers Lounge
- The Taggers Lounge Exclusive
- Tiny Turtles
- Tiny Turtles Store
- Updates
- Valentine
- VeryMany
- VM Artists
- VMArtists
- Western
- Wicked Princess Scraps
- Winter
- Wonderland
- WordArt
- Zindy Zone
- Zlatam Store


