Sunday, February 28, 2016

This tutorial is written for those with knowledge of PSP
Supplies Needed:
Tube of choice: I'm using the wonderful art work of Lightartist_XXX
Which you must obtain a license to use HERE
PTU Scrap Kit by Jen from Sweet Temptations called "Shamrock Field"
You an purchase this awesome kit HERE
Template #19 by Wendy HERE
Mask of choice
Don't forget to leave a thank you when downloading
Ok Lets get Started:
Open template - Shift D to duplicate then close out original
Canvas size 700x700
delete copyright and dotted lines
Click on frame bkg selections,select all, float,defloat
paste a paper of choice from the kit - I used paper10
selection invert delete
select none delete the original
Click on frame selections,select all, float,defloat
paste a paper of choice from the kit - I used paper8
selection invert delete
select none delete the original
Click on circle frame bkg selections,select all, float,defloat
paste a paper of choice from the kit - I used paper9
select none delete the original
add noise with settings of choice
Place your main tube
Xero Radiance with settings of choice
Now time to add our elements
I used the following:
Basket
Fountain
Grass 2
Ladder
Wreath
Merge your layers
Open paper of choice and apply mask
Place your name where you like it
Add the Copyright and your License Number for the tube
Resize to your liking and save as PNG
This tutorial was created on Feburary 28,2016 by Rhonda
Any resemblance to another Tag or Tutorial is purely coincidental

This tutorial is written for those with knowledge of PSP
Supplies Needed:
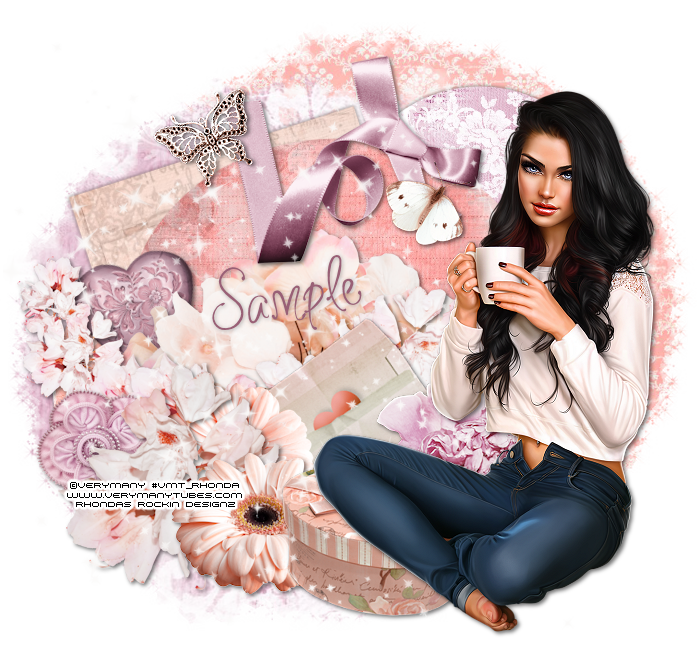
Tube of choice: I'm using the wonderful art work of VeryMany
You can purchase these tubes
PTU Scrap Kit by A Space Between called Cutie Pie
I purchased this kit at Dees Store HERE
Template by Sarah HERE
Don't forget to leave a thank you when downloading
Ok Lets get Started:
Open template - Shift D to duplicate then close out original
Resize template to your desired size
Delete copyright,layers 2,6&9
I moved my layers around a little
Click on raster 5 selections,select all, float,defloat
paste a paper of choice from the kit - I used paper3
selection invert delete
select none delete the original
Click on raster 4 selections,select all, float,defloat
paste a paper of choice from the kit - I used paper2
selection invert delete
select none delete the original
Click on raster 3 selections,select all, float,defloat
paste a paper of choice from the kit - I used paper1
selection invert delete
select none delete the original
Place your main tube
Now add any other elements of choice
I used the following:
Element 1
Element 2
Element 4
Element 5
Element 23
Element 24
Element 25
Element 33
Element 35
Element 37
Element 38
Element 42
Element 46
Merge your layers
Open paper of choice and apply mask
I applied 2 mask to my tag
Place your name where you like it
Add the Copyright and your License Number for the tube
Resize to your liking and save as PNG
This tutorial was created on Feburary 28,2016 by Rhonda
Any resemblance to another Tag or Tutorial is purely coincidental
HERE
Friday, February 26, 2016

This tutorial is written for those with knowledge of PSP
Supplies Needed:
Tube of choice: I'm using the wonderful art work of KiwiBG
You must obtain a license to use this art at TTD HERE
PTU Scrap Kit by Laura from Tiny Turtle Design called "Sexy Ass"
You an purchase this awesome kit at her store HERE
Template #10 by Sylvie HERE
Mask of choice
Don't forget to leave a thank you when downloading
Ok Lets get Started:
Open template - Shift D to duplicate then close out original
Resize template 78% all layers
Canvas 700x700
Delete copyright
Click on pink circles selections,select all, float,defloat
paste a paper of choice from the kit - I used paper17
selection invert delete
select none delete the original
Click on black oval selections,select all, float,defloat
paste a paper of choice from the kit - I used paper7
selection invert delete
select none delete the original
Click on white squares selections,select all, float,defloat
paste a paper of choice from the kit - I used paper12
selection invert delete
select none delete the original
Click on pink circle back selections,select all, float,defloat
paste a paper of choice from the kit - I used paper9
selection invert delete
select none delete the original
Click on black circle selections,select all, float,defloat
paste a paper of choice from the kit - I used paper13
selection invert delete
select none delete the original
Click on pink circle right selections,select all, float,defloat
paste a paper of choice from the kit - I used paper20
selection invert delete
select none delete the original
Colorize rounded text
Click on white square back selections,select all, float,defloat
paste a paper of choice from the kit - I used paper22
selection invert delete
select none delete the original
add noise
Click on black square selections,select all, float,defloat
paste a close-up of tube insie square
selection invert delete
select none delete the original
Click on white rectangle selections,select all, float,defloat
paste a paper of choice from the kit - I used paper19
selection invert delete
select none delete the original
Colorize stars
Place your tube
Now time to add our elements
I used the following:
Element 2
Element 16
Element 19
Element 23
Element 25
Element 28
Element 37
Element 42
Element 43
Element 49
Element 51
Element 59
Element 60
Element 77
Element 82
Element 84
Element 121
Element 125
Merge your layers
Open paper of choice & apply mask
Place your name where you like it
Add the Copyright and your License Number for the tube
Resize to your liking and save as PNG
This tutorial was created on Feburary 25,2016 by Rhonda
Any resemblance to another Tag or Tutorial is purely coincidental
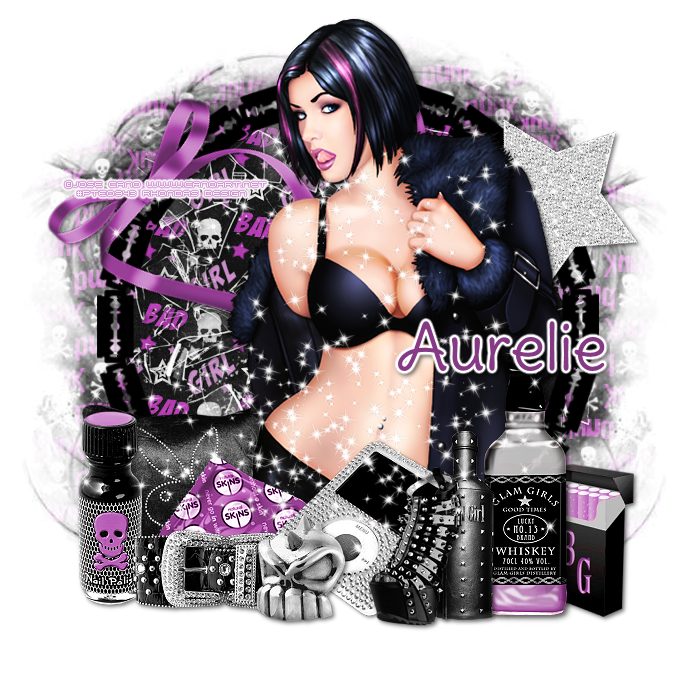
This tutorial is written for those with knowledge of PSP
Supplies Needed:
Tube of choice: I'm using the wonderful art work of Jose Cano
You can purchase his tubes HERE
You can purchase this awesome kit at one of her stores HERE
Mask of choice
Ok Lets get Started:
Open a blank image 700x700
Open element 54 and place as a new image
Grab the magik wand and click inside frame
Select modify expand by 10
Open paper 5 and place as a new layer
selections invert - delete
Move paper under frame
Place your tube
Xero Radiance with settings of choice
Now add any elements of choice
I used the following:
Element 4
Element 11
Element 14
Element 20
Element 21
Element 23
Element 25
Element 28
Element 30
Element 33
Element 38
Element 45
Element 53
Element 58
Merge your layers
Open paper of choice and apply mask
Place your name where you like it
Add the Copyright and your License Number for the tube
Resize to your liking and save as PNG
This tutorial was created on Feburary 26,2016 by Rhonda
Any resemblance to another Tag or Tutorial is purely coincidental
Monday, February 22, 2016

This tutorial is written for those with knowledge of PSP
Supplies Needed:
Tube of choice: I'm using the wonderful art work of Elisa Chatzoudis
This tube was purchased at PTE which has closed
You must obtain a license to use HERE
Mask of choice
Ok Lets get Started:
Resize elements to your liking
This is a very quick and easy tutorial
Open blank canvas 700x700
Open element 34 & place as new layer
Click inside with magic wand & expand by 10
Open paper 4 and paste as new layer
Selections invert delete
Move paper under frame
Place your main tube & build around it
Now time to add our elements
I used the following:
Element 2
Element 3
Element 6
Element 12
Element 13
Element 28
Element 43
Element 45
Merge layers
Open paper of choice and apply mask
Place your name where you like it
Add the Copyright and your License Number for the tube
Resize to your liking and save as PNG
This tutorial was created on Feburary 22,2016 by Rhonda
Any resemblance to another Tag or Tutorial is purely coincidental
Saturday, February 20, 2016
This tutorial is written for those with knowledge of PSP
Supplies Needed:
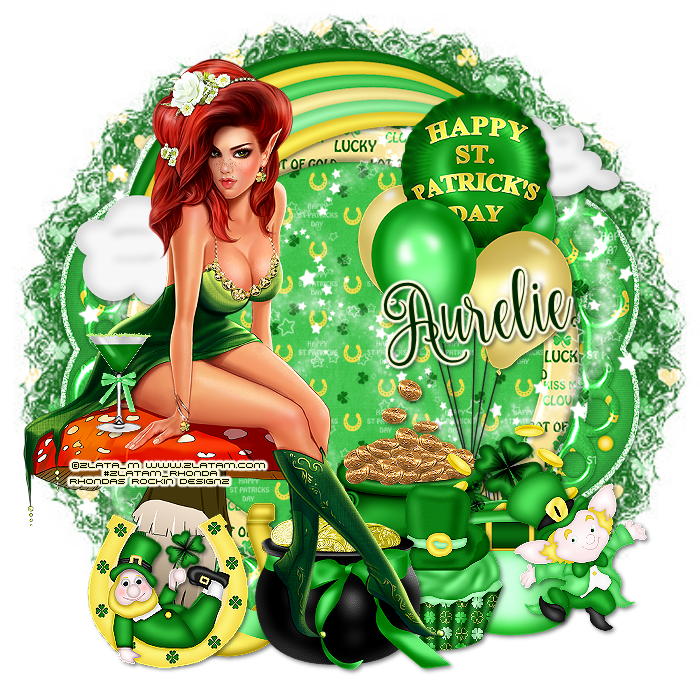
Tube of choice: I'm using the wonderful artwork of Zlata_M
You can purchase her tubes HERE
You can purchase this awesome kit at one of her stores HERE
Mask of choice
Ok Lets get Started:
Open a blank image 700x700
Open element 31 and place as a new layer
Open element 16 and place as new layer
Grab the magik wand and click inside frame
Open paper 12 and place as a new layer
Move paper under frames
Place your main tube
Now add any elements of choice
I used the following:
Element 3
Element 13
Element 18
Element 22
Element 24
Element 28
Element 32
Element 33
Element 36
Element 37
Element 45
Merge your layers
Open paper of choice and apply mask
Place your name where you like it
Add the Copyright and your License Number for the tube
Resize to your liking and save as PNG
This tutorial was created on Feburary 20,2016 by Rhonda
Any resemblance to another Tag or Tutorial is purely coincidental

This tutorial is written for those with knowledge of PSP
Supplies Needed:
Tube of choice: I'm using the wonderful art work of Ismael Rac
Which you must obtain a license to use at his store HERE
FTU Scrap Kit by Designs by Vaybs HERE
Mask #36 by Crispified HERE
Ok Lets get Started:
Open a white blank canvas 700x700
Open element 49 from kit and place as a new layer
Click inside frame with magic wand
Selections modify expand by 10
Open paper 11 and paste as new layer
Move paper under frame
Place tube to middle of frame
Now let's add our elements to the tag
I used the following:
Element 2
Element 8
Element 10
Element 14
Element 53
Element 61
Element 64
Merge your layers
Open paper 5 & apply mask
Place your name where you like it
Add the Copyright and your License Number for the tube
Resize to your liking and save as PNG
This tutorial was created on February 13,2016 by Rhonda
Any resemblance to another Tag or Tutorial is purely coincidental
Saturday, February 13, 2016

This tutorial is written for those with knowledge of PSP
Supplies Needed:
Tube of choice: I'm using the wonderful art work of Keith Garvey
I bought this tube at MPT which has closed
Which you must obtain a license to use at his store HERE
Template #88 from Yvette HERE
Free CU papers HERE
Supplies HERE
Mask of choice
Ok Lets get Started:
Open template - Shift D to duplicate then close out original
Increase canvas size to 700x650
Delete copyright
Open tube and place in center of template
Apply Xero Radiance with settings of choice
Click on large oval selections,select all, float,defloat
paste a paper of choice - I used paper6
selection invert delete
select none delete the original
Add a border of 5 with color/paper of choice
Add noise with settings of choice
Click on small oval selections,select all, float,defloat
paste a paper of choice - I used paper2
selection invert delete
select none delete the original
Add a border of 3 with color/paper of choice
Add noise with settings of choice
Click on black rectangle selections,select all, float,defloat
paste a paper of choice - I used paper5
selection invert delete
select none delete the original
Add a border of 5 with color/paper of choice
Add noise with settings of choice
Click on pink squares selections,select all, float,defloat
paste a paper of choice - I used paper4
selection invert delete
select none delete the original
Add close-up of same tube or different tubes in the squares
Apply Xero Radiance at default settings
Apply Luminance blend mode
Apply Photo Effex Scanlines at default settings
If you don't have this filter use the blinds effect in psp
On frames layer apply noise with setting of choice
I applied twice on my tag
On text layer change color of text to match tag
Do the same for the dotted lines
Open the supplies and use ONLY what is in zip to decorate your tag
Merge your layers
Open paper 3 and apply mask of choice
Place your name where you like it
Add the Copyright and your License Number for the tube
Resize to your liking and save as PNG
This tutorial was created on Feburary 4,2016 by Rhonda
Any resemblance to another Tag or Tutorial is purely coincidental

This tutorial is written for those with knowledge of PSP
Supplies Needed:
Tube of choice: I'm using the wonderful art work of Ismael Rac
You can purchase his tubes at his store HERE
FTU Scrap Kit by Tasha's Playground "Totally Rad" HERE
Template # by Jus Graphix HERE
It's the middle template
Mask of choice
Don't forget to leave a thank you when downloading
Ok Lets get Started:
Open template - Shift D to duplicate then close out original
Canvas size 700x700
Delete copyright
Click on layer 11 selections,select all, float,defloat
paste a paper of choice from the kit - I used paper12
selection invert delete
select none delete the original
I colorized mine using Hue & Saturation
add border with noise
Click on layer 7&10 selections,select all, float,defloat
paste a paper of choice from the kit - I used paper8
selection invert delete
select none delete the original
Click on layers 6 selections,select all, float,defloat
paste a paper of choice from the kit - I used paper6
selection invert delete
select none delete the original
Click on layer 5&3 selections,select all, float,defloat
paste a paper of choice from the kit - I used paper9
selection invert delete
select none delete the original
place close-up in the squares
apply filter of choice
Click on layers 4&2 selections,select all, float,defloat
add new layer and flood fill with color of chhoice
selection invert delete
select none delete the original
add noise
Click on layers 1 selections,select all, float,defloat
paste a paper of choice from the kit - I used paper19
selection invert delete
select none delete the original
Place your main tube
apply Xero radiance with settings of choice
Now add any other elements of choice
I used the following:
Bow
Button
Cupcake
Flower 2
Frame 1&2
Rainbow 2
Rolled Flower 1&2
Sparkle
Stars
Merge your layers
Open paper and apply mask of choice
Place your name where you like it
Add the Copyright and your License Number for the tube
Resize to your liking and save as PNG
This tutorial was created on Feburary 12,2016 by Rhonda
Any resemblance to another Tag or Tutorial is purely coincidental

This tutorial is written for those with knowledge of PSP
Supplies Needed:
Tube of choice: I'm using the wonderful art work of Lysisange
You must obtain a license to use this art at S&Co HERE
PTU Scrapkit from Designs by Joan HERE
Template #6 from Allison HERE
Mask of choice
Ok Lets get Started:
Open template - Shift D to duplicate then close out original
Increase canvas to 700x700
Delete copyright & layers 3,4&7
Click on layer 1 selections,select all, float,defloat
paste a paper of choice from the kit - I used paper1
selection invert delete
select none delete the original
Click on layer 2 selections,select all, float,defloat
paste a paper of choice from the kit - I used paper2
selection invert delete
select none delete the original
Click on layer 5 selections,select all, float,defloat
paste a paper of choice from the kit - I used paper3
selection invert delete
select none delete the original
Click on layer 6 selections,select all, float,defloat
paste a paper of choice from the kit - I used paper4
selection invert delete
select none delete the original
Click on layer 8 selections,select all, float,defloat
paste a paper of choice from the kit - I used paper5
selection invert delete
select none delete the original
Click on layer 9 selections,select all, float,defloat
paste a paper of choice from the kit - I used paper6
selection invert delete
select none delete the original
Place your tube
Now time to add our elements
I used the following:
Element 3
Element 12
Element 14
Element 15
Element 26
Element 39
Element 40
Element 41
Element 43
Element 44
Element 51
Element 58
Merge your layers
Place your name where you like it
Add the Copyright and your License Number for the tube
Resize to your liking and save as PNG
This tutorial was created on Feburary 13,2016 by Rhonda
Any resemblance to another Tag or Tutorial is purely coincidental

Friday, February 12, 2016


I'll post them for all to see but sorry I just can't tut them right now.
I have a bad habit of doing a tag then saying to myself I'll tut it later
Well...later never comes
I'll try to be better about getting tag tutorial while I am doing the tag
It has just been crazy in my personal life along with work so you understand
Have a great Valentine's weekend!!!!!!!!!!!!!!!!!!!!

Wednesday, February 10, 2016
This tutorial is written for those with knowledge of PSP
Supplies Needed:
Tube of choice: I'm using the wonderful art work of Laguna
Which you must obtain a license to use at PFD HERE
FTU Scrap Kit by Tasha "MardiGras 2013" HERE
Mask of choice
Ok Lets get Started:
Open a white blank canvas 700x700
Open frame 6 from kit and place as a new layer
Click inside frame with magic wand
Selections modify expand by 10
Open paper 5 and paste as new layer
Move paper under frame
Place tube to center of frame
Now let's add our elements to the tag
I used the following:
Bubbly
City
Drink
Fan
Feather 2
Gliter Spray
Halftone
Hat
Ribbon 4
Sparkles
Stars 2
Street Sign
Merge your layers
Open paper & apply mask
I added a matching avatar to my tag
Place your name where you like it
Add the Copyright and your License Number for the tube
Resize to your liking and save as PNG
This tutorial was created on February 10,2016 by Rhonda
Any resemblance to another Tag or Tutorial is purely coincidental

This tutorial is written for those with knowledge of PSP
Supplies Needed:
Tube of choice: I'm using the wonderful art work of Elias Chatzoudis
This tube was purchased at MPT which has closed
Which you must obtain a license to use at his store HERE
PTU Scrapkit by Niqui's Designs called "Sweet Romance"
You can purchase this awesome kit at her store HERE
Template #737 by Millie HERE
Mask of choice
Ok Lets get Started:
Open template - Shift D to duplicate then close out original
Delete copyright, layers 1-4,12,13,15&16
Click on layers 5 selections,select all, float,defloat
paste a paper of choice from the kit - I used paper1
selection invert delete
select none delete the original
Click on layer 6 selections,select all, float,defloat
paste a paper of choice from the kit - I used paper9
selection invert delete
select none delete the original
Click on layer 7 selections,select all, float,defloat
paste a paper of choice from the kit - I used paper6
selection invert delete
select none delete the original
Click on layer 8 selections,select all, float,defloat
paste a paper of choice from the kit - I used paper7
selection invert delete
select none delete the original
Click on layer 9 selections,select all, float,defloat
paste a paper of choice from the kit - I used paper10
selection invert delete
select none delete the original
Click on layer 10&11 selections,select all, float,defloat
paste a paper of choice from the kit - I used paper11
selection invert delete
select none delete the original
Place your tube
Now time to add our elements
I used the following:
Element 1
Element 4
Element 5
Element 7
Element 8
Element 11
Element 13
Element 14
Element 22
Element 23
Element 27
Element 30
Element 34
Element 36
Element 60
Merge your layers
Open paper of choice and apply mask
Place your name where you like it
Add the Copyright and your License Number for the tube
Resize to your liking and save as PNG
This tutorial was created on Feburary 10,2016 by Rhonda
Any resemblance to another Tag or Tutorial is purely coincidental

This tutorial is written for those with knowledge of PSP
Supplies Needed:
Tube of choice: I'm using the wonderful art work of Keith Garvey
This tube was purchased at MPT which has closed
You can purchase his work at his store HERE
FTU Scrapkt by With a Smiekeltje HERE
Template #1 by Sylly Creationz HERE
Mask #17 by Ria's PSP Paradise HERE
Ok Lets get Started:
Open template - Shift D to duplicate then close out original
Resize template to your liking
Canvas size 700x700
Deleted copyright
Click on bottom & top black rectangle selections,select all, float,defloat
add new layer and paste gradient of choice
selection invert delete
select none delete the original
Click on gradient rectangle selections,select all, float,defloat
paste a paper of choice from the kit - I used paper4
select none delete the original
Click on gradient circles selections,select all, float,defloat
paste a paper of choice from the kit - I used paper1
selection invert delete
select none delete the original
Click on pink long rectangle selections,select all, float,defloat
paste a paper of choice from the kit - I used paper2
selection invert delete
select none delete the original
Click on pink small rectangles selections,select all, float,defloat
paste a paper of choice from the kit - I used paper3
selection invert delete
select none delete the original
Click on black rectangle selections,select all, float,defloat
add new layer and flood fill with color of choice
select none delete the original
Click on pink and black squares selections,select all, float,defloat
paste a paper of choice from the kit - I used paper6
selection invert delete
select none delete the original
Add close up of tubes inside squares
apply Xero Radiance with settings of choice
Add noise to the white frames with settings of choice
Place your tube
Xero Porcelin with settings of choice
Now time to add our elements
I used the following:
Element 1
Element 2
Element 4
Element 7
Element 10
Element 11
Element 13
Merge your layers
Open paper and apply mask
Place your name where you like it
Add the Copyright and your License Number for the tube
Resize to your liking and save as PNG
This tutorial was created on Feburary 10,2016 by Rhonda
Any resemblance to another Tag or Tutorial is purely coincidental
Saturday, February 6, 2016

This tutorial is written for those with knowledge of PSP
Supplies Needed:
Tube of choice: I'm using the wonderful art work of Toriya
You must obtain a license to use this art at S&Co HERE
PTU Scrapkit from Designs by Joan called "Millena"
Kit can be purchased at S&CO HERE
Kit and tube match and there are 2 other kits that match tube as well
Mask of choice
Ok Lets get Started:
Resize elements to your liking
This is a very quick and easy tutorial
Open blank canvas 700x700
Open element 17 & place in center of tag
Grab the magic wand & click inside frame
Selections modify expand by 10
Open paper 4 and paste as new layer
Move paper under frame
Place your main tube & build around it
Now time to add our elements
I used the following:
Element 13
Element 14
Element 16
Element 19
Element 20
Element 21
Element 24
Element 40
Element 56
Element 57
Element 58
Element 64
Element 68
Element 70
Element 71
Element 78
Merge layers
Open paper 3 and apply mask
Place your name where you like it
Add the Copyright and your License Number for the tube
Resize to your liking and save as PNG
This tutorial was created on Feburary 6,2016 by Rhonda
Any resemblance to another Tag or Tutorial is purely coincidental
Friday, February 5, 2016
This tutorial is written for those with knowledge of PSP
Supplies Needed:
Tube of choice: I'm using the wonderful art work of Andy Cooper
You must obtain a license to use this art at S&Co HERE
PTU Scrapkit from Bibi's Collection HERE
This is a free gift with an $5.00 purchase from S&CO - Tube is also included
Template #3 from Hope & Dee HERE
Mask of choice
Ok Lets get Started:
Open template - Shift D to duplicate then close out original
Increase canvas to 700x700
Delete copyright & wordart
Click on pink rectangle selections,select all, float,defloat
paste a paper of choice from the kit - I used paper11
selection invert delete
select none delete the original
Click on creme oval selections,select all, float,defloat
paste a paper of choice from the kit - I used paper4
selection invert delete
select none delete the original
Click on pink circle selections,select all, float,defloat
paste a paper of choice from the kit - I used paper1
selection invert delete
select none delete the original
Add noise to circle layer
Click on pink rectangle selections,select all, float,defloat
paste a paper of choice from the kit - I used paper6
selection invert delete
select none delete the original
Click on black squares selections,select all, float,defloat
paste a paper of choice from the kit - I used paper9
selection invert delete
select none delete the original
Add close-up of tube inside squares
Click on white frames selections,select all, float,defloat
paste a paper of choice from the kit - I used paper7
selection invert delete
select none delete the original
apply Xero Fritillary with settings of choice
Click on top & bottom white sripes selections,select all, float,defloat
paste a paper of choice from the kit - I used paper2
selection invert delete
select none delete the original
Click on top & bottom pink stripe selections,select all, float,defloat
paste a solid color of choice
selection invert delete
select none delete the original
Click on top & bottom hearts selections,select all, float,defloat
paste a solid color of choice
selection invert delete
select none delete the original
add noise with settings of choice
Click on large hearts selections,select all, float,defloat
paste a paper of choice from the kit - I used paper12
selection invert delete
select none delete the original
add border with noise
Place your main tube
Now time to add our elements
I used the following:
Element 6
Element 7
Element 8
Element 17
Element 23
Element 30
Element 31
Element 32
Element 36
Element 40
Element 41
Element 44
Element 54
Element 61
Merge your layers
Open paper of choice & apply mask
Place your name where you like it
Add the Copyright and your License Number for the tube
Resize to your liking and save as PNG
This tutorial was created on Feburary 5,2016 by Rhonda
Any resemblance to another Tag or Tutorial is purely coincidental

This tutorial is written for those with knowledge of PSP
Supplies Needed:
Tube of choice: I'm using the wonderful art work of OrkusArt
You can purchase this tube at PFD HERE
FTU Scrap Kit by Digital Designs by Carolina HERE
Template #167 by HorsePlays Pasture HERE
Don't forget to leave a thank you when downloading
Ok Lets get Started:
Open template - Shift D to duplicate then close out original
Canvas size 700x700
Delete copyright
Click on layer 1 selections,select all, float,defloat
paste a paper of choice from the kit - I used paper7
selection invert delete
select none delete the original
Click on layer 2 selections,select all, float,defloat
paste a paper of choice from the kit - I used paper4
selection invert delete
select none delete the original
Click on layers 3 selections,select all, float,defloat
paste a paper of choice from the kit - I used paper7
selection invert delete
select none delete the original
Click on layer 4 selections,select all, float,defloat
paste a paper of choice from the kit - I used paper5
selection invert delete
select none delete the original
Click on layers 5&7 selections,select all, float,defloat
paste a paper of choice from the kit - I used paper2
selection invert delete
select none delete the original
Click on layer 6 selections,select all, float,defloat
paste a paper of choice from the kit - I used paper3
selection invert delete
select none delete the original
Place your tube
apply Xero radiance with settings of choice
Now add any other elements of choice
I used the following:
Element 1
Element 6
Element 9
Element 12
Element 20
Element 22
Element 23
Element 25
Element 27
Element 29
Element 44
Element 48
Element 50
Element 52
Element 54
Merge your layers
Open paper of choice and apply mask
Place your name where you like it
Add the Copyright and your License Number for the tube
Resize to your liking and save as PNG
This tutorial was created on Feburary 5,2016 by Rhonda
Any resemblance to another Tag or Tutorial is purely coincidental

This tutorial is written for those with knowledge of PSP
Supplies Needed:
Tube of choice: I'm using the wonderful art work of Alex Prihodko
Which you must obtain a license to use HERE
PTU Scrapkit by Dees'Sign Depot called "I Adore You"
You can purchase this awesome kit at her store HERE
Mask of choice
Ok Lets get Started:
Open a white blank canvas 700x700
Open frame 1 from kit and place as a new layer
Click inside frame with magic wand
Selections modify expand by 10
Open paper 6 and paste as new layer
Move paper under frame
Place tube to right of frame
Now let's add our elements to the tag
I used the following:
Element 14
Element 23
Element 36
Element 37
Element 42a
Element 43a
Element 67
Element 70
Element 71
Element 75b
Element 84d
Element 84e
Merge your layers
Open paper of choice & apply mask
Place your name where you like it
Add the Copyright and your License Number for the tube
Resize to your liking and save as PNG
This tutorial was created on February 5,2016 by Rhonda
Any resemblance to another Tag or Tutorial is purely coincidental

This tutorial is written for those with knowledge of PSP
Supplies Needed:
Tube of choice: I'm using the wonderful art work of VeryMany
Which you must obtain a license to use HERE
PTU Scrapkit by Jens Sweet Temptations called "For The Love Of"
You can purchase this awesome kit at one of her stores HERE
Template #486 by Millie HERE
Mask of choice
Ok Lets get Started:
Open template - Shift D to duplicate then close out original
Increase canvas size 700x700
Delete copyright & 2 hearts
Click on layers 1 selections,select all, float,defloat
paste a paper of choice from the kit - I used paper7
selection invert delete
select none delete the original
Click on layer 2 selections,select all, float,defloat
paste a paper of choice from the kit - I used paper1
selection invert delete
select none delete the original
Click on layer 3 rectangle selections,select all, float,defloat
paste a paper of choice from the kit - I used paper8
selection invert delete
select none delete the original
Click on layer 4 selections,select all, float,defloat
paste a paper of choice from the kit - I used paper5
selection invert delete
select none delete the original
Click on layer 5 selections,select all, float,defloat
paste a paper of choice from the kit - I used paper9
selection invert delete
select none delete the original
Click on layer 6 selections,select all, float,defloat
paste a paper of choice from the kit - I used paper3
selection invert delete
select none delete the original
Click on layer 7 selections,select all, float,defloat
paste a paper of choice from the kit - I used paper4
selection invert delete
select none delete the original
Click on layer 8&9 selections,select all, float,defloat
paste a paper of choice from the kit - I used paper2
selection invert delete
select none delete the original
Place your tube
Now time to add our elements
I used the following:
Bear Cup
Bling 1
Cake
Candles
Candy 2
Coffee
Frame 3&4
Gift Bag
Love Potion
Ribbon 2
Ring
Rose n Card
Scatter
Merge your layers
Open paper of choice and apply mask
Place your name where you like it
Add the Copyright and your License Number for the tube
Resize to your liking and save as PNG
This tutorial was created on Feburary 2,2016 by Rhonda
Any resemblance to another Tag or Tutorial is purely coincidental

This tutorial is written for those with knowledge of PSP
Supplies Needed:
Tube of choice: I'm using the wonderful art work of Eugene Rzhevaskii
Which you must obtain a license to use HERE
PTU Scrap Kit by Purple Dream Scraps called "My Valentine"
You can purchase this awesome kit from one of her stores HERE
Template #734 by Millie HERE
Mask of choice
Ok Lets get Started:
Open template - Shift D to duplicate then close out original
Resize template 110% all layers
Canvas size 700x700
Delete copyright & word art
Click on layer 1 selections,select all, float,defloat
paste a paper of choice from the kit - I used paper8
selection invert delete
select none delete the original
Click on layer 2 selections,select all, float,defloat
paste a paper of choice from the kit - I used paper14
selection invert delete
select none delete the original
Click on layer 3 selections,select all, float,defloat
paste a paper of choice from the kit - I used paper15
selection invert delete
select none delete the original
Click on layer 4 selections,select all, float,defloat
paste a paper of choice from the kit - I used paper12
selection invert delete
select none delete the original
Click on layer 5&6 selections,select all, float,defloat
paste a close-up of tube inside squares
selection invert delete
select none delete the original
Apply Xero Radiance
I added 2 borders with noise to mine
Place your tube
Now time to add our elements
I used the following:
Element 2
Element 6
Element 7
Element 21
Element 25
Element 28
Element 43
Element 50
Element 51
Element 63
Element 65
Element 68
Merge your layers
Open paper of choice and apply mask
Place your name where you like it
Add the Copyright and your License Number for the tube
Resize to your liking and save as PNG
This tutorial was created on Feburary 2,2016 by Rhonda
Any resemblance to another Tag or Tutorial is purely coincidental

This tutorial is written for those with knowledge of PSP
Supplies Needed:
Tube of choice: I'm using the wonderful art work of Maryline Cazenave
Which you must obtain a license to use at CDO HERE
FTU Scrapkit by AmyMarie HERE
Template #189 by Millie HERE
Mask by Crispified HERE
Ok Lets get Started:
Open template - Shift D to duplicate then close out original
Increase canvas size 700x700
Delete copyright,layers 8&9
I added a border with noise to all my layers
Click on layer 1 selections,select all, float,defloat
paste a paper of choice from the kit - I used paper1
selection invert delete
select none delete the original
Click on layer 2 selections,select all, float,defloat
paste a paper of choice from the kit - I used paper3
selection invert delete
select none delete the original
Click on layer 3 selections,select all, float,defloat
paste a paper of choice from the kit - I used paper5
selection invert delete
select none delete the original
Click on layer 4 selections,select all, float,defloat
paste a paper of choice from the kit - I used paper8
selection invert delete
select none delete the original
Click on layer 5 selections,select all, float,defloat
paste a paper of choice from the kit - I used paper4
selection invert delete
select none delete the original
Click on layer 6 selections,select all, float,defloat
paste a paper of choice from the kit - I used paper6
selection invert delete
select none delete the original
Colorize wordart to match your tag & move if needed
Place your tube
Now time to add our elements
I used the following:
Element 5
Element 8
Element 9
Element 10
Element 20
Element 22
Element 24
Element 30
Element 35
Element 36
Element 41
Element 42
Element 43
Element 47
Element 51
Merge your layers
Open paper of choice and apply mask
Place your name where you like it
Add the Copyright and your License Number for the tube
Resize to your liking and save as PNG
This tutorial was created on Feburary 1,2016 by Rhonda
Any resemblance to another Tag or Tutorial is purely coincidental
Subscribe to:
Posts
(Atom)
Grab My Blinkie

I CT For


Blogs I Visit


